Sunday, November 1, 2020

Tools, Tricks and Tips for the Workshop!


Using the dewalt 4.5” circular saw


In this video I show you how I use my super portable cordless Dewalt 4.5 inch circular saw. I also show you how to make 2 very useful jigs for making quick cross cuts and rip cuts. This little saw doesn’t take up much space. It’s light weight, portable and cut wood up to 1.5 inches thick and can handle plywood as well. 
The simple crosscut jig for your circular saw: Using Thin CA glue and accelerator guarantees nothing shifts while driving in the screws. And after that first cut is made you have a reference for all subsequent cuts simply line the end of the jig to your line and cut. 
I recommend using a wider board so the jig is more ridged. Guide track jig is simply a thin piece if MDF and a straight piece of wood. It’s made in a a similar fashion as the crosscut jig and can be used for cutting plywood or making rip cuts. All that is needed is a clamp to secure it down. 


 Izzy Swan’s Tablesaw Infeed Saddle

I recently purchased an infeed attachment for my sawstop table saw. It’s made by Izzy Swan. This thing is a must have for anyone who uses a table saw. It lets you use the miter gauge past the table which if you’ve ever tried doing it’s pretty much impossible to get an accurate cut. It also makes cutting sheet goods easier and most importantly safer. You no longer have to pull a balancing act to get it done. It’s easy to assemble. Easily attached and removed when not in use. I highly recommend this infeed table. I purchased mine directly from his site www.izzyswan.com He makes different versions for different saw types and brands. Thumbsy approved ;-).


Turn an Old Pullsaw into a Cabinet Scraper


In this video I show you how I turn an old pull saw into a card scraper. I usually go through about one saw per year. Since I use the cheaper saws as my beater saws the get ruined pretty quick. This is a great way to bring new life to an old worn out saw


Monday, October 12, 2020

YouTube gear


 This is a list of some of the equipment I use to make YouTube videos. This includes cameras, microphones, lights...etc.  

Cameras

I set up a few areas in the shop to mount little action cameras or GoPro type cameras. These are small and stay out of the way for the most part as I go about using machinery. 


Microphones

I use a few different microphones when recording. For voice overs I prefer this one. It’s part of the amazon basic line but it is actually an exceptional microphone. I recommend getting a pop screen for this microphone. It is highly sensitive and will pick up a everything. I will be making a egg carton sound proofing box. will let you know how well that works. The voice over in my longer videos is done with this mic. You can hear the difference in quality from the shorter vids which is done through my phone or iPad. 

I use this mic to record exclusively with my Windows os laptop. I have yet to try it with other devices but will update this post when that happens. 


The other microphone I use is a smaller mic that works well for me in the shop for direct recording and shop noise. It works with the iPad and my iPhone but it does require adapters to connect and work. 


Lights
My workshop is quite dark. The walls are dark and most areas aren’t well lit so for sometimes a bit more light is required that why I also use these lights hey are cheap I mainly use them for product photos and adding light to areas I want to focus on. To avoid harsh lighting I bounce the light off of some white card stock that I usually have in the shop. A diffuser would also help. 


iPad
After everything is recorded it gets edited on my iPad Pro. I prefer to use adobe rush (limited free app). It is very similar to iMovie which is also free and comes with the iPad software. 

Tuesday, August 25, 2020

Sandbox Play Area and Marble Machine


In this video I will walk you through how I built this sandbox play area in the small area in our backyard. it features a standing sandbox with storage and a marble machine.

The plans and cut list will be available soon. 
The materials can be found in most home centers. and can be built in a with a few basic tools.
You can use a small 4 1/2-inch circular saw. with a speed square for most of the cuts. I will have a video showing how to make cuts with this saw for this project.
a tape measure for obvious reasons.
a drill and a variety of bits.
pocket hole jig is not necessary, but it helps.
building the maze portion, you will need a level especially if the ground is uneven
a jigsaw with a scrolling blade, an acrylic cutting blade and metal cutting blade or a hacksaw for the aluminum rods
a step bit is usually known for drilling metal, but I found that it works well for acrylic sheets
hammer and nails, and exterior screws
a heavy-duty staple gun and staples are optional as well
I built this play area before I decided to put videos up online but after I saw how much my son loved it. I decided to make a video about it, and I created this 3d model so I can show you how it was done.

Sunday, July 5, 2020

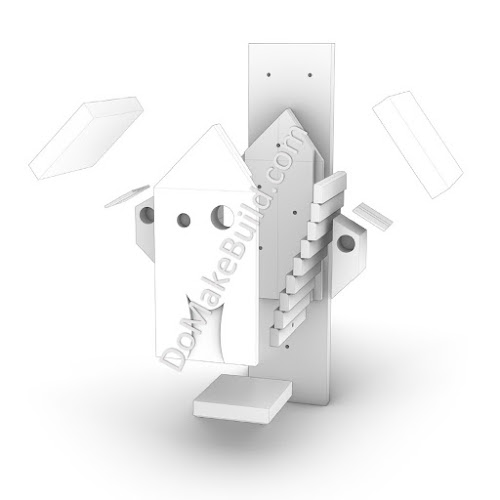
Whimsical Birdhouse Build


In this video I show step by step how to make this Whimsical birdhouse. Its sure to bring a smile to your back yard. I used an 8 foot cedar deck board for this build. I also show you how to carve details using a bench chisel and a knife. And to take it a step further I decided to add contrast to the roof in a non traditional way. I painted it with FIRE! I also show you a few tricks along the way! I used a table saw for most of this build but you can use a variety of tools with the same results. I built this birdhouse to attract local nesting birds in my area. But you can adjust this birdhouse for the birds that you want to attract.


Air BnB (read as Air bird and beak) 


I live in New York, there are a lot of bird species that might call this birdhouse a home. This all based on my own online research, I am not an expert ornithologist. But I do play one on TV. 

The hole opening and floor size, as well as the hole height. (1 1/4 inch opening minimum 6 inches from the house floor. With a floor space of 4 1/2 x 4 1/2.) 


Cavity nesting birds 


Nut hatches

House sparrows

Downy woodpeckers

Wrens

Warblers

Titmice

Chickadees


You can adjust this birdhouse to fit other birds as well. Birds that larger hole and slightly larger floor space. 

Yellow belly sap sucker

Blue birds

Tree swallows


Rough Cut list 

Cedar deck board 

Actual size 1 inch x 5.5 inches x 96


All cross cuts unless otherwise specified 


Face and back

2x 14 inches 


Roof

2x 7 inches


Bottom

4 inches


Walls

4x 6 inches

Then into 1/2 inch strips 

5 from each board


Leave 4x 1 1/2 inch pieces for ears/sides


Back panel 

Cut this last! 

24 inches


7 Screws 

1 1/2 inches long


21 gauge pin nails

1 inch and 5/8


Eye hook


Monday, June 15, 2020

Do Make Build Recommended! Summer Edition


There are times when I may have purchased or used a product that has simply made life easier.
Sometimes its a kitchen tool or a something that helped with parenting or something that was just awesome. I will be posting these items here. You can help support Do Make Build by using the affiliate links below.

Mosquito repellent
Every summer and spring I like to spend as much time as I can with my family in our little backyard oasis. Nothing ruins our outdoor fun like those pesky mosquitoes. I have tried everything from bug zappers to citronella plants and candles nothing has worked as well as this. Hands down my favorite mosquito repellent is made by Thermacell. Practically no odor, no harmful chemicals, user friendly and this version comes with a nice lantern. It has about a 15 foot "protection zone", which is great for small backyards. You have to purchase replacement butane cartridges and mosquito repellent pads.
I have two versions, one of them too take with us when we decide to go for a picnic. I purchase the cartridges and mats in bulk about once a year and stay mosquito free all summer long!


Firestarters

Nothing smells more like summer than BBQ or wood fires. The easiest and fastest way I've found to get my summer started is with some lighter cubes by Webster. Just one cube under your charcoal chimney or wood stack is all you need. If your old school there are always fatwood sticks. 
 

Thursday, June 11, 2020

Making a magnetic chalkboard.

Here’s a quick, simple build. Making a magnetic chalkboard. 
In this my video, I go over the steps and show how to make an old fashioned chalk board. Good for indoor or outdoor displays. Teachers, stores fronts, moms, dads and kids can all enjoy using this chalkboard.
Super simple to make. I used a table saw, a handsaw, a chisel, a small hand plane and a drill.  If you don't have a table saw you can make this using any saw and a router. 
The materials can be found at most home stores.


Materials

1/4 in 24x48 exterior grade plywood sheet


24x36 26 gauge galvanized sheet


Chalk board paint


Paint primer


120 grit sandpaper


Pva glue 


Cedar 1x6 decking board (4ft used)


Screws


Chalk


Help support DoMakeBuild by using my affiliate links below:

Sunday, May 24, 2020

Whittling and Carving


Whittling is perhaps the simplest form of wood working. It can be done with only a carving knife. For beginners interested in whittling as a hobby I recommend getting at least one quality knife. It should be sharp and kept sharp throughout the carving. I recommend getting a detail knife, these knives usually come to a fine point which allow you to get into tighter spaces.
What the video to see the ways I hold my whittling knife to make a cut.


Once you feel comfortable enough holding the knife feel free and try to carve a small figurine. In this video I show you how to carve a little bunny. Part 1 shows you the roughing out process.

In part 2 I show you how to carve the details using the same knife.


Help Support DoMakeBuild by using my affiliate links below.

Tuesday, March 31, 2020

Finding Your Center

Center finders!
One way to find the center on round or square stock is by using center finders such as these. They are pretty simple to use and they can be purchased or made out of wood. On square stock you simply place them flush against you stock. Mark with pencil or knife. Center can be found where the lines intersect. I prefer to mark on all four side to ensure accuracy. If you find that after marking four sides that your lines make a small rectangle. It means your sock was not square but you now you can get extremely close to center since the small area between your line is your center. Sometimes after marking you finds a small square in the middle this is most likely due to the thickness of your marking tool and the offset that happens when you mark.
Finding center on round stock is similar to square except you would mark three intersections. And the  are where the lines converge is your center. As shown in the image. This is extremely helpful when mounting your stock on to the lathe. Play the video below for a demonstration of using this on square and round stock.

Finding the center of a board can be done many ways. The most fool proof way I’ve found is by using a dedicated center finding ruler. No math required simply measure the board and find the correlating measurement on the bottom half of the ruler and you’ve found it.

Sometimes you may not have way to find center using traditional means. In this video I am gluing up for a segmented turning and need to make sure it’s as close to the middle as possible. Since there is no way to use a divider and this isn’t a perfect circle I show you an easy method using just your finger and a pencil.

Help support DoMakeBuild by using my affiliate links below: